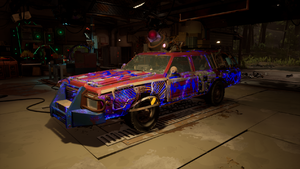
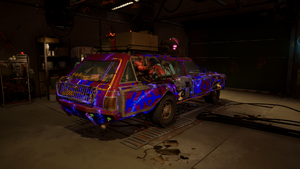
Player Logbook Entry
Alright, yeah- no. I'm done. I'm done! They almost got me this time. I need a new strategy. I'm scrambling around like a headless chicken.
While fixing whatever was left of this piece of junk, I was thinking. I remember the Steward saying "You must balance the number of Artifacts in your care. If you take too many, you'll quickly learn the consequences."
These Maws, they come after me if I take too many artifacts. And nothing else, it looks like. Is that really the only consequence? Look, if I take a few Artifacts, they will hunt me down and hurt me. But if I take all of them, what are they gonna do, chew through God?
Submitted by: Perru
Part List
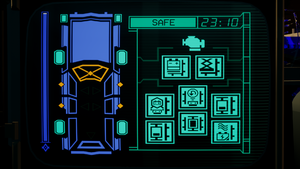
Body Parts
- Front Attuned Armored Bumper
- Reinforced Headlights
- Hood Attuned Armored Panel
- Front Attuned Insulated Panels
- Front Attuned Armored Doors
- Rear Attuned Anticorrosive Doors
- Rear Attuned Armored Panels
- Trunk Attuned Insulated Panel
- Rear Any Attuned Bumper (Anticorrosive Bumper used in screenshots)
- Wheels Offroad Tires (All-Terrain tires are not recommended)
- Engine LIM-Chipped Engine
Rack Expansions and Utilities
- Front Roof Anti-Grav Emitter
- Rear Roof XL Roof Storage
- Left Seat High-Capacity Battery
- Right Seat Jump Jacks
- Front Left Rack Anchor Energy Converter
- Rear Left Rack Side Storage
- Front Right Rack Side Storage
- Rear Right Rack Mini Turbine
Detailing
- Blue Paint (Front Bumper), Red Paint (everywhere else possible)
- Decals The Cool Glow (all parts)
- Fully Cracked windows (optional)
Run preparations
Artifacts
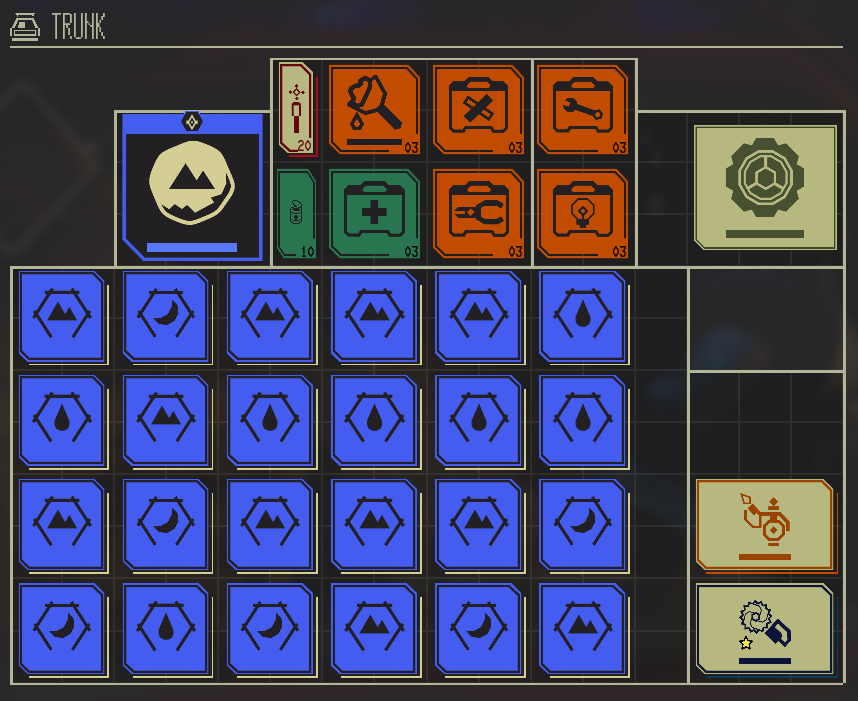
All Artifacts are listed per type, and each sub-list is sorted from most to least important. Which Artifacts are absolutely required, etc. are detailed in the "Strategy" category. This list is a suggestion, feel free to add your own!
Do not carry exact duplicates of Artifacts (for example, 2x Impactful Harmony). Additional Artifacts won't do anything and you will only waste storage.
A LIM-Chipped Engine? Without any additional fuel storage? How can I even drive the car further than 12 meters?
- Broken Siphon (Shadows) (When car is damaged, fuel increases): constant refuel;
- Patient Siphon (Currents) (When the car drives slowly, fuel increases): get out of tricky situations;
- Deflating Siphon (Shadows) (While wheels are flat, fuel increases): when in trouble, it will help you crash less often.
You won't last long if you hit every single obstacle that dares to render on your screen.
- Impactful Harmony (Currents) (When car crashes, Harmonic Energy increases): reduces damage taken, helps deal with other Artifacts;
- Screaming Harmony (Vales) (When radio is louder, Harmonic Energy increases): on/off repairs;
- Guided Harmony (Currents) (While car is facing north, Harmonic Energy increases): on/off repairs when stopped;
- Rough Harmony (Vales) (While car is on dirt roads, Harmonic Energy increases);
- Flowing Harmony (Currents) (While car is submerged, Harmonic Energy increases);
- Deflating Harmony (Currents) (While wheels are flat, Harmonic Energy increases): auto repairs when in trouble;
- Ailing Harmony (Currents) (While your health is hurt, Harmonic Energy increases).
This build is made for speed. Don't be afraid to break past 300 mph!
- Pressurized Speed (Vales) (While wheels are not flat, engine power gets stronger);
- Shaded Speed (Shadows) (When headlights are off, engine power gets stronger);
- Flowing Speed (Currents) (While car is submerged, engine power gets stronger);
- Rough Speed (Vales) (While car is on dirt roads, engine power gets stronger);
- Pessimistic Speed (Vales) (While car is tilted downhill, engine power gets stronger);
- Guided Speed (Vales) (While car is facing north, engine power gets stronger).
You might spin out a lot. These Artifacts sure will help:
- Blazing Tracks (Vales) (When the car drives fast, handling offroad improves);
- Shaded Tracks (Vales) (When headlights are off, handling offroad improves);
- Charged Grip (Shadows) (When LIM Energy increases, handling on roads improves): interacts with Artifacts that increase LIM Energy.
You can use your abilities and consume LIM Energy to make your car fly. Granted, the landing is not guaranteed. But you also won't land if you're in orbit:
- Optimistic Power (Vales) (When car is tilted uphill, LIM Energy increases): generate power to be immediately consumed when coming back downhill;
- Released Power (Shadows) (When Anomalies release you, LIM Energy increases).
Miscellaneous Artifacts, that will help you or tie well with other Artifacts. You may not like some, feel free to ignore them:
- Ailing Merriment (Vales) (When your health is hurt, items appear): fight fire with fire;
- Rough Vitality (Vales) (While car is on dirt roads, your health heals);
- Piloted Escape (Vales) (When you are behind the wheel, Anomalies release you): avoids wasting battery on a LIM Shield when it works;
- Flowing Escape (Currents) (While car is submerged, Anomalies release you);
- Blazing Song (Vales) (When the car drives fast, radio volume goes up): louder radio repairs the car and increase your engine power.
As of update 1.14, these Artifacts don't do anything because the car is entirely made of attuned armor. These Artifacts are useful once, or if, the bug is patched.
- Charged Integrity (Shadows) (When LIM Energy increases, car is repaired): interacts with Artifacts that increase LIM Energy;
- Exposed Integrity (Vales) (When the trunk is opened, car is repaired).
Trunk storage
Don't forget
- (A) (B) → (Car) (Jolts forward) Quirk. (Wipers) (Toggle) is most recommended.
- A Trunk In The Trunk (required)
- ARC Doc
Strategy
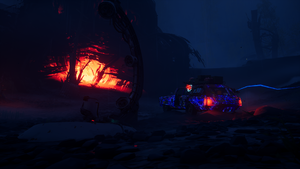
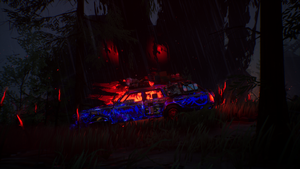
This car is built to drive like hell. It's built to hit speed records, fly across the map, hit stunts no stuntmen could dream of, and so on. If you do not drive the car fast enough, you won't crash enough to be self-sufficient in fuel.
This archangel is made to work with Artifacts. Without Artifacts, it will only protect you so much and will run out of fuel in a matter of minutes. The most important Artifacts are fuel (because you do not have any fuel capacity upgrades) and harmonic energy (to keep up and tank crashes) Artifacts. This config absolutely requires the Broken Siphon (Shadows) (When car is damaged, fuel increases) Artifact. The harmonic energy Artifacts have the bonus of letting you run attuned panels in the story map, since they repair the car fast enough to not need the resonator.
Artifacts won't do it all. I recommend getting a Car Jolts Forward quirk. Quirks can easily be obtained using an Artifact like Lightweight Oddity (Shadows) (When car parts are uninstalled, a Quirk is applied). You can make a macro to spam the Car Jolts forward to maximize speed (and fun).
This car is designed to hold 30 Artifacts before the garage. It has enough storage to satisfy the looting needs of most loot goblins, or barely collect all Artifacts on 28-junctions Whispering Woods runs (if you sacrifice a few items in the trunk: consume all heal, putty, repair kits, the Olympium torch and get rid of the spare wheel, you can store up to 72 Artifacts).
You're meant to make heavy use of the Anti-Grav Emitter and the Jump Jacks. This will drain substantial amounts of battery. The Artifacts and Mini Turbine will help you last longer, but you will have to use the Anchor Energy Converter frequently. If you collect all Artifacts and anchors in the Whispering Woods, expect to consume a third to half of your anchors to recharge the battery.
On rare occasions, if you drive too hard and you're in a situation where many of your Artifacts don't repair the car, you may need to heal manually. Run preparations recommend that you put a 3x3 Bounty in storage. They nicely fit in the 3x3 storage and hold 300 HKW. Just like Souvenirs, you can drain and refill its harmonic energy using the Resonator. It is close to 3 times as storage-efficient as Souvenirs.
Specs (using rear Anticorrosive Bumper): health (armor only) / harmonic energy capacity: 695 HKW (+ 300 HKW in the trunk); base synergy with all listed Artifacts: -426; highest recorded speed: 357mph.
Remember: Speed has never killed anyone. Suddenly become stationary... won't either. Floor it!
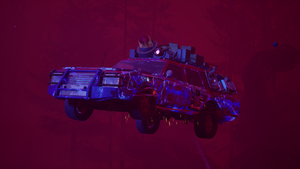
Gallery
